For any individual photographers, ecommerce owners, and business brands, it is necessary to know that by using the ghost mannequin effect, the product will be visible from every angle.
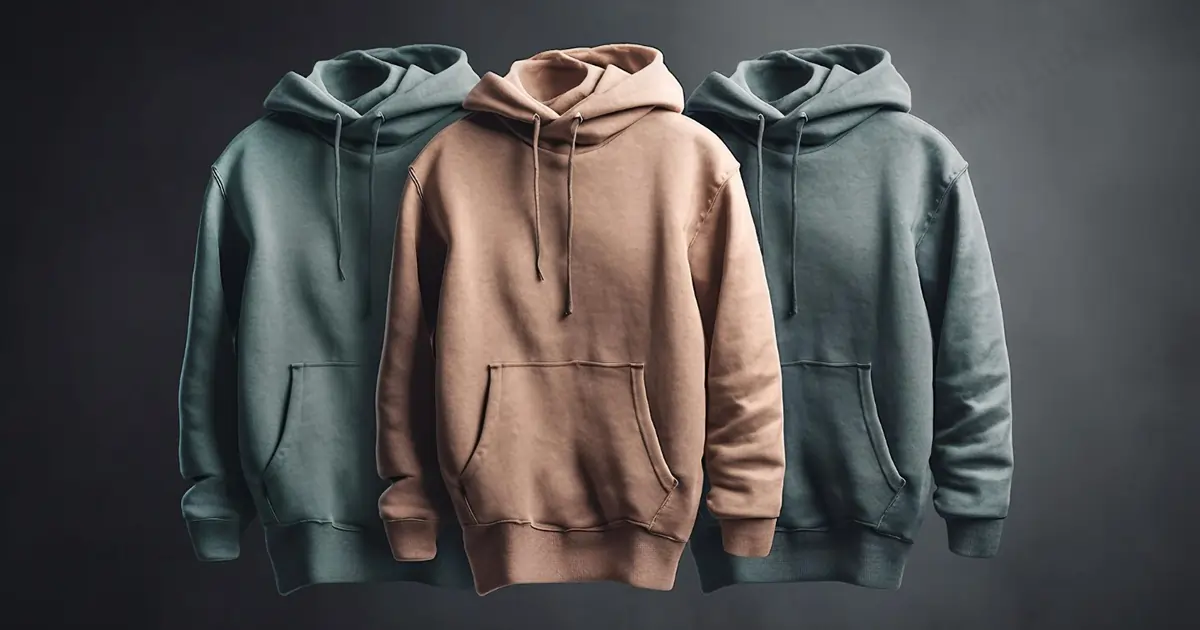
The ghost mannequin effect is a post-production process that makes clothing appear to be worn by an invisible model, so it will create a 3D shape for the product photos, and buyers will understand the product.
This technique makes accurate visuals and improves buyer trust that aligns with the marketplace across North America, Canada, and Australia. Anyone can use this technique at home using desktops, tablets, or mobile devices.
So if you want to master the ghost mannequin photo editing effect for product photos, you need to read the below article:
Shoot the Photos
Step 1: Set Up Consistent Lighting
Set your lighting system for the entire shoot. The garment should be illuminated from edge to edge so fabric texture, seams, and folds remain visible across every image. Any lighting shift will create problems during editing.
Use soft, diffused light instead of hard or direct sources. Soft light removes distracting shadows inside collars and along seams, which will be reduced in the editing task, and preserves natural garment dimension for professional ghost mannequin results.
- Position one light on the left and one on the right.
- Place both lights the same distance from the mannequin.
- Aim lights slightly downward toward the torso.
- Check the neck area for dark or harsh shadows.
- Lock light stands and do not move them
Step 2: Mount the Camera on a Tripod
Put the tripod in front of the mannequin. Open the tripod legs fully so it does not shiver. Attach your camera on top and make it tight so the camera won’t move.
Raise or lower the tripod so the camera lens is facing the middle of the clothing. When you look through the camera, the garment should be centered and straight. After this, do not touch the tripod again.
- Open the tripod legs and place them on a flat floor.
- Fix the camera tightly on the tripod head.
- Adjust height until lens faces chest.
- Make sure clothing looks straight in the frame.
- Once you set the tripod, then do not touch it for all photos.
Step 3: Capture the Front-on Mannequin Image
This image reveals structure, symmetry, and garment posture. A well-fitted form, often regarded as the best product photography mannequin, prevents fabric damage and uneven folds. A straight-on camera angle protects critical proportions for online buyers.
- Adjust the garment so the left and right sides match.
- Straighten the collar so it sits evenly.
- Check shoulders are at the same height.
- Remove visible creases with your hands.
- Make sure clothing hangs naturally.
Step 4: Photograph the Inside Neck or Label Area
The interior collar shot creates the round effect during processing. The angle, distance, and lighting must align with the main image to preserve natural depth.
- Remove the front mannequin section if possible.
- Do not move the tripod or camera.
- Take the photo from the same spot.
- Make sure the inside collar is fully visible.
- Ensure fabric texture looks clear and sharp.
Step 5: Take Optional Detail Shots for Refinement
These extra photos are taken only when the garment has details that may not look clean in the main image. This includes sleeves, thick collars, hoods, or layered fabric. Having these images allows you to replace small areas later instead of forcing heavy edits.
- Turn sleeves inside out and photograph them.
- Take a photo of the back of the collar.
- Keep the camera and lights unchanged.
- Save each photo with clear file names.
Edit in Photoshop
Step 6: Open Both Images in Photoshop
Begin by loading the two images you captured: the main mannequin photo and the inside-neck photo. These files must show up inside the same document so they can be layered, masked, and adjusted without scaling errors.
- Launch Adobe Photoshop
- Open the main mannequin image
- Drag the inside-neck image into the file
- Keep each image on its layer.
Step 7: Align the Images
Alignment determines whether the final editing looks realistic or artificial. If the layers do not match perfectly, collar edges will appear broken or doubled.
- Select both image layers.
- Click Auto-Align Layers
- Choose the Auto option
- Check collar and shoulder overlap
Step 8: Cut Out the Main Garment
At this stage, you are removing the background so only the clothing remains visible. The goal is to separate the garment cleanly from everything behind it. This allows you to place the clothing on a white background.
Faster approach:
- Click Select Subject
- Refine edges in Select and Mask
- Apply a layer mask
Cleaner edges:
- Choose the Pen Tool
- Trace the garment outline
- Convert path to selection
- Apply a precise mask
Step 9: Create the Hollow Neck Using the Inside-Neck Layer
You are now using the second photo you took to show what sits behind the collar. This image will replace the mannequin area inside the neck so the garment looks naturally hollow.
- Drag the inside-neck photo layer below the main garment layer.
- Use Free Transform to resize it to the collar opening.
- Add a layer mask to the inside-neck layer.
- Paint black to hide everything except the collar area.
- Move the image slightly until the collar edges line up.
Step 10: Remove All Visible Mannequin Areas
At this point, parts of the mannequin may still be visible inside the neck, shoulders, or armholes. These areas must be hidden so only the clothing remains visible.
- Click on the garment layer
- Click on its layer mask thumbnail
- Select the Brush Tool
- Set brush color to black
- Paint over any visible mannequin parts
- Zoom in and check edges carefully
Step 11: Add Natural Depth Inside the Neck Area
After removing the mannequin, the neck opening may look flat. You need to add slight shading so it looks like a real hollow space inside the garment.
- Create a new layer above the inside-neck layer
- Select a soft, round brush
- Lower brush opacity to around 10–15%
- Paint lightly around the inside collar
- Stop as soon as depth looks natural
Step 12: Remove Dust, Wrinkles, and Small Marks
Now clean the garment surface without changing its original shape. This step improves presentation but should never reshape the clothing.
- Select the Spot Healing Brush Tool.
- Click on small dust or lint spots.
- Use Clone Stamp for deeper creases.
- Sample nearby fabric texture.
- Work slowly and zoom in often.
Step 13: Adjust Colors to Match the Real Garment
Color correction ensures the garment looks the same online as it does in real life. This builds buyer confidence and reduces returns.
- Add a new adjustment layer.
- Adjust brightness and contrast slightly.
- Correct color balance if needed.
- Match inner collar color to outer fabric.
- Avoid strong color changes.

DIY Ghost Mannequin on Desktop/Laptop
Desktop editing gives you the tightest control over edges, alignment, and fabric detail. On a large display, you can spot small collar breaks and seam halos that 35% of buyers notice when they zoom. This workflow also scales cleanly for catalog batches.
Step 1: Capture the Required Source Images
Start with two photographs taken under the same conditions. These will be merged later, so small inconsistencies at capture translate into larger problems during compositing.
- Photograph garment on mannequin, straight-on
- Take inner neck or label photo, same angle
- Keep camera position unchanged
- Confirm lighting matches in both shots
Step 2: Load Images Into Your Editor
Open both photos into one working file so they can be stacked and adjusted together. This keeps proportions intact and avoids accidental resizing.
- Open the main garment photo first.
- Import the inner-neck image as a new layer.
- Stack layers in one document.
- Avoid scaling during import.
Step 3: Align the Images Precisely
Alignment determines whether the collar looks seamless or stitched together. This is the moment where the ghost mannequin technique succeeds or fails.
- Photoshop/Photopea: select layers, run Auto-Align.
- GIMP: reduce opacity, move layer manually.
- Match collar edge and shoulder points.
- Restore opacity after alignment.
Step 4: Remove the Background Cleanly
Isolate the garment so only the clothing remains visible. A clean cutout is essential whether you keep editing in-house or send files to ghost mannequin photo editing services for volume production later.
- Use Select Subject, Magic Wand, or Pen Tool
- Refine selection around seams and edges
- Apply a layer mask
- Check edges at 100% zoom
Step 5: Insert the Inner Neck Image
Place the inner-neck layer beneath the main garment layer so the collar interior appears naturally hollow. This step turns a simple cutout into a convincing ghost mannequin photo.
- Move inner-neck layer below garment layer
- Resize to fill collar opening
- Mask everything except the interior collar area.
- Nudge position until seams line up
Step 6: Remove Any Remaining Mannequin Visibility
Hidden mannequin parts often show near armholes, shoulder edges, or inside the collar. Remove them carefully without thinning the garment’s edge.
- Select the garment’s layer mask
- Brush black over mannequin remnants
- Zoom into armholes and neckline
- Recheck edges after every adjustment
Step 7: Add Realism and Final Adjustments
This finishing stage is where DIY results begin to resemble a professional ghost mannequin editing service. Keep depth subtle, preserve fabric texture, and avoid reshaping product features.
- Add soft shading inside the collar.
- Remove lint and minor wrinkles.
- Apply gentle color correction.
- Stop before the texture looks plastic.
Step 8: Export for Online Use
Export settings determine how the image performs in store grids and zoom views. If the final file will be processed further in ghost mannequin Photoshop workflows, keep a layered master copy as well.
- Export JPG for white background listings.
- Use PNG when transparency is required.
- Keep resolution consistent across the catalog.
- Name files clearly for easy sorting.
DIY Ghost Mannequin on Mobile Phone
Phones do not use layers the same way as computers, every step must be done slowly and carefully. The goal is not perfection, but a clean, usable product image.
Step 1: Take the Two Required Photos
You must take two photos of the same garment. Both photos must be taken from the same place so they match later.
Do this exactly:
- Place the phone on a table or small tripod
- Stand the mannequin straight in front of the phone.
- Take one photo of the full garment
- Take one photo showing the inside collar
- Do not move the phone between photos
Step 2: Remove the Background from the Main Photo
This step keeps only the clothing and removes everything else.
Do this on your phone:
- Open the main photo in a background remover app
- Tap “Remove Background”
- Wait for the cutout to finish
- Zoom in and erase leftover background.
- Save the cutout image
Step 3: Add the Inside-Neck Photo
Now place the second photo behind the collar area so the neck looks empty.
Do this on your phone:
- Open the background-removed image.
- Add the inside-neck photo as a new layer.
- Resize the inside-neck photo smaller.
- Move it behind the collar area.
- Erase parts that extend outside the collar.
Step 4: Make the Collar Look Natural
This step prevents the collar from looking pasted on.
Do this on your phone:
- Select the eraser tool
- Lower eraser hardness
- Smooth the collar edges gently
- Zoom in while adjusting
- Stop when edges look clean
Step 5: Fix Brightness and Color
Phones often change brightness automatically. You need both parts to match.
Do this on your phone:
- Open brightness and contrast controls
- Adjust until inner collar matches garment
- Avoid strong color filters.
- Keep fabric texture visible
Step 6: Save the Final Image
Prepare the image so it is ready to upload.
Do this on your phone:
- Export as high-quality JPG.
- Use PNG if the background is transparent.
- Save image to gallery.
- Check the image before uploading.
DIY Ghost Mannequin on Tablet
A tablet gives you a larger screen than a phone, which makes it easier to see edges and small mistakes. You will still use touch or a stylus, but the extra space helps you work more accurately.
Step 1: Open the Two Photos
You need both photos open in the same editing app.
Do this exactly:
- Open a photo editing app on your tablet.
- Open the full garment photo first.
- Add the inside-neck photo into the same project.
- Make sure both photos are visible.
Step 2: Remove the Background from the Main Photo
This step removes everything except the clothing.
Do this exactly:
- Tap the background removal tool
- Let the app remove the background
- Zoom in around the collar and sleeves.
- Erase any background still showing
- Check that only clothing remains
Step 3: Place the Inside-Neck Photo Behind the Collar
Now you will use the second photo to fill the neck opening.
Do this exactly:
- Select the inside-neck photo.
- Resize it smaller using two fingers.
- Move it behind the collar opening.
- Erase any part outside the collar.
Step 4: Clean the Collar Edges
This makes the collar look smooth and natural.
Do this exactly:
- Select the eraser tool.
- Use a soft edge setting.
- Slowly clean rough collar edges.
- Zoom in while cleaning.
- Stop when edges look smooth.
Step 5: Fix Brightness and Color
Both photos must look like one image.
Do this exactly:
- Open brightness or light controls.
- Adjust until the inner collar matches the garment.
- Do not use strong filters.
- Keep fabric details visible.
Step 6: Save the Final Image
Now prepare the image for uploading.
Do this exactly:
- Export the image as JPG.
- Use PNG only if the background is clear.
- Save image to tablet storage.
- Open the saved image to check it.

DIY Ghost Mannequin Using Online Tools
This method is for people who do not want to install anything. Everything happens inside a web browser.
Step 1: Open the Website and Upload Photos
You need to upload two photos.
Do this exactly:
- Open your internet browser
- Go to an online photo editing website
- Click the button that says “Upload”
- Upload the full garment photo
- Upload the inside-neck photo
Step 2: Remove the Background from the Main Photo
Now remove everything except the clothing.
Do this exactly:
- Click on the full garment photo
- Click the button “Remove Background”
- Wait until the background disappears
- Look around the collar and sleeves
- Erase any background still visible
Step 3: Place the Inside-Neck Photo
Now use the second photo to fill the neck area.
Do this exactly:
- Click “Add Image” or “Add Layer”
- Select the inside-neck photo
- Make it smaller
- Drag it behind the collar opening
- Erase parts outside the collar
Step 4: Make the Collar Look Clean
This step removes rough edges.
Do this exactly:
- Select the eraser tool
- Choose a soft edge option
- Slowly erase rough collar edges
- Zoom in while erasing
- Stop when edges look smooth
Step 5: Save the Final Image
Now download the image.
Do this exactly:
- Click “Download”
- Choose JPG for a white background
- Choose PNG if the background is transparent.
- Save the file to your device
- Open the saved image to check it
Online tools are useful for quick work, but for detailed garments, many sellers still rely on a ghost mannequin photo editing service to avoid mistakes and save time.
Device Comparison: Choosing the Right Setup for Your Workflow
Different devices solve different problems. This comparison focuses on how each option performs when speed, control, and output consistency matter. Rather than ranking tools, the table below helps you match device choice with workload size, accuracy needs, and production expectations.
Ghost Mannequin Device Comparison Table
| Device Type | Level of Control | Editing Accuracy | Processing Speed | Learning Curve | Best Use Case |
| Desktop / Laptop | Very high | Precise edge control | Moderate | Steeper | Large catalogs, premium listings |
| Tablet (iPad / Android) | High | Clean with manual refinement | Moderate | Medium | Small batches, stylus-based editing |
| Mobile Phone | Limited | Acceptable for basic edits | Fast | Low | Quick updates, low-volume products |
| Online Tools | Basic | Software-dependent | Very fast | Very low | Temporary use, rapid mockups |
FAQ of How to create DIY Ghost Mannequin Effect for Product Photos
Is DIY ghost mannequin suitable for high-volume catalogs?
DIY ghost mannequins work for small batches, but high-volume catalogs need speed, consistency, and precision that manual workflows cannot maintain.
When should brands outsource ghost mannequin photo editing services?
Brands should outsource when handling large catalogs, tight deadlines, or premium listings requiring flawless edges and consistent visual standards.
Does AI fully replace the manual ghost mannequin technique?
AI tools help with speed, but manual editing is still required for complex garments, accurate collars, and realistic depth control.
What causes unrealistic hollow neck results?
Poor image alignment, inconsistent lighting, mismatched angles, and over-editing often cause flat, broken, or unnatural hollow neck areas.
How important is export format for SEO and CRO?
Correct export formats improve image loading speed, visual clarity, zoom performance, and buyer trust, directly impacting SEO and conversion rates.
Conclusion
Ghost mannequin photo editing shows clothing without a visible model, so buyers clearly see the shape and fit. DIY methods work at home, but good lighting, careful editing, and the right device are needed for clean, professional-looking product photos.