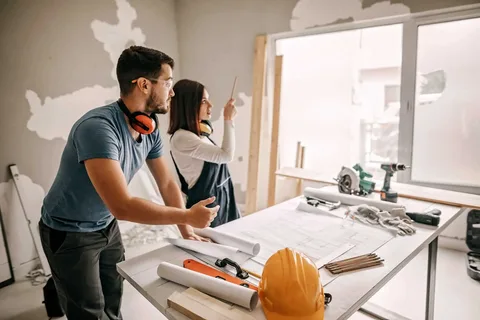
Most bathroom renovation mistakes happen before a single tile gets laid. Homeowners skip the planning stage, get one quote, fall in love with a product they saw on Instagram, and then wonder why the project blew $8,000 over budget.
A bathroom renovation in Australia involves licensed tradespeople, compliance certificates, waterproofing standards, and council rules, none of which work the way people assume. Getting your head around the process before you start is what separates a smooth renovation from a stressful one.
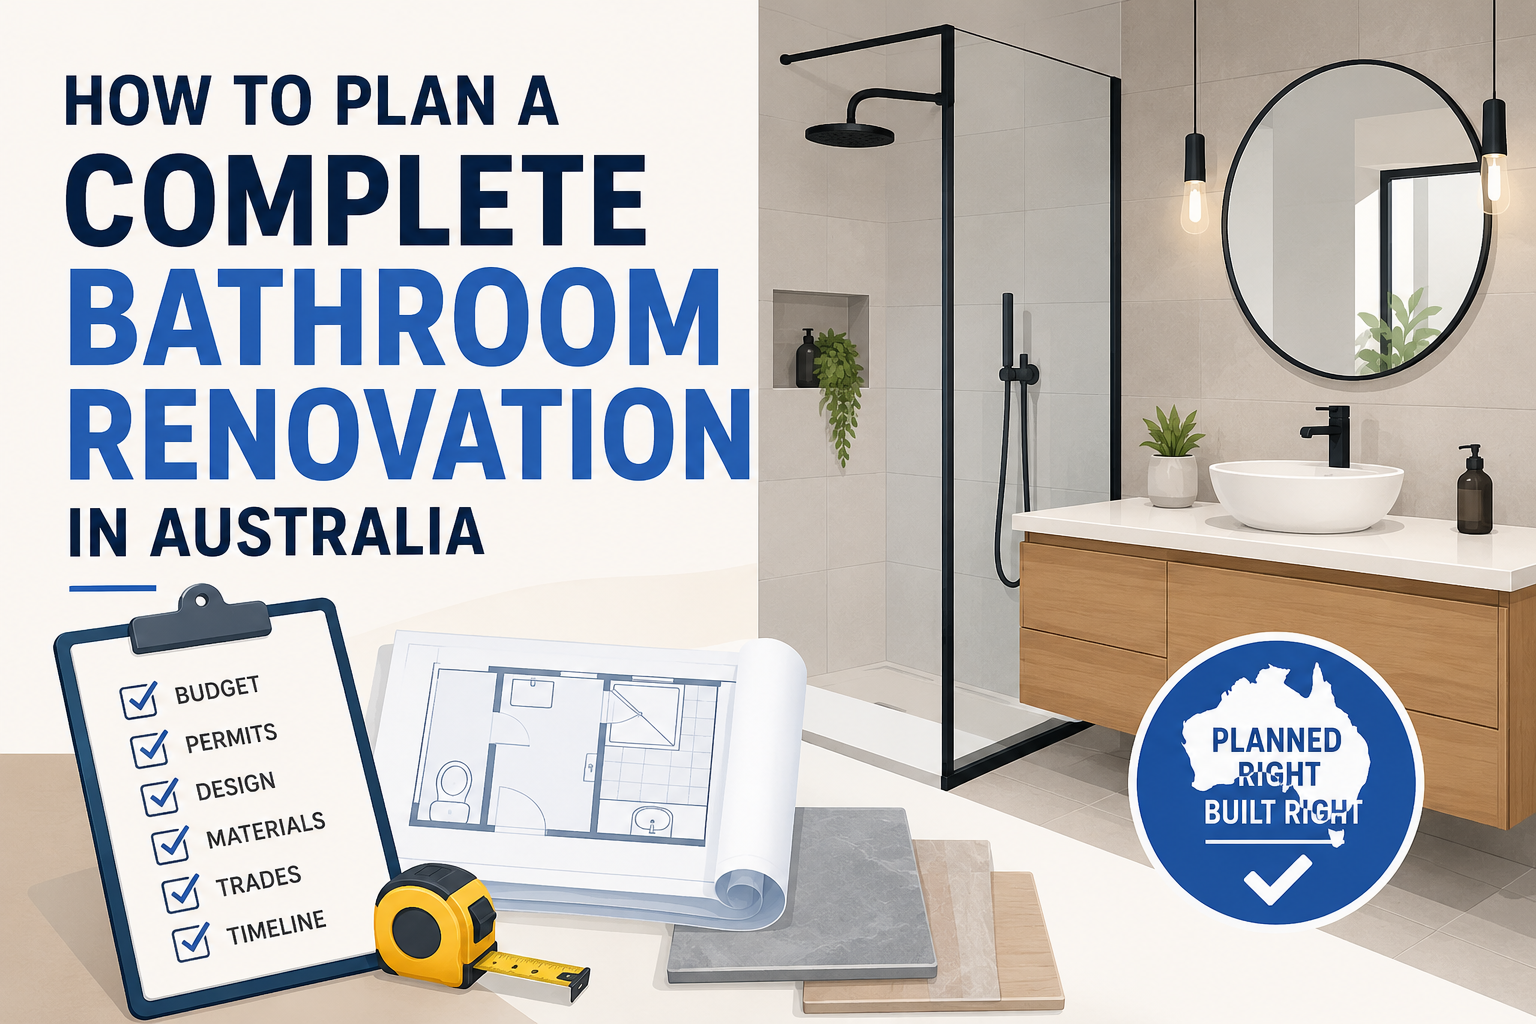
Step 1: Set a Realistic Budget
The average bathroom renovation cost in Australia in 2026 ranges from $15,000 to $25,000 for a standard renovation. A basic refresh can start from $10,000, while a full renovation with layout changes and premium finishes can exceed $50,000.
Here is a rough breakdown of the three main tiers:
Budget renovation $10,000 to $15,000 Cosmetic updates, keeping existing plumbing positions, standard fixtures, and basic tiling. Suitable for rental properties or quick pre-sale refreshes. You will not be retiling floor to ceiling or moving the shower at this price.
Mid-range renovation $15,000 to $30,000 New fixtures, full retiling, updated vanity and shower, basic layout retained. This is where most Australian homeowners land. According to the Housing Industry Association of Australia, most homeowners spend around $20,000 for mid-range renovations.
High-end renovation $30,000 to $50,000+ Layout changes, premium fixtures, heated floors, frameless shower screens, custom joinery. Once you start moving plumbing or knocking out walls, costs climb fast.
Build in a contingency. Hidden water damage, asbestos in older homes, and structural surprises are common once walls come down. Renovation experts recommend building in a contingency budget from day one 15 to 20 percent of your total budget is a sensible buffer.
Location matters too. Sydney homeowners typically pay 15 to 25 percent more than the national average due to higher labour costs, stricter compliance requirements, and strong demand for qualified tradespeople.
Step 2: What Permits and Approvals You Need for Bathroom Renovation
The rules vary by state and by the scope of the work, but here is how it generally works across Australia.
Most cosmetic renovations do not need council approval. Replacing tiles, swapping fixtures, painting, and updating accessories that keep existing plumbing positions intact are typically exempt from requiring a Development Application (DA).
You will likely need a building permit when:
- Moving or relocating plumbing, shower, toilet, or vanity
- Making structural changes, including removing walls
- Changing the bathroom’s footprint or converting another room into a bathroom
- Carrying out waterproofing work (in most states)
Failing to obtain the correct approvals can result in council fines, stop-work notices, insurance refusal, and expensive rectification work. It can also create serious problems when you sell the property.
Waterproofing compliance is non-negotiable regardless of permit status. Bathroom waterproofing in Australia must comply with AS 3740 for domestic wet areas. Even if council approval is not required, your renovation must still comply with waterproofing standards. A licensed waterproofer must do the work and issue a compliance certificate when the job is done.
State-specific notes:
- NSW: Renovations over $5,000 should be completed by a licensed contractor. Work involving plumbing or electrical changes must be carried out by licensed professionals.
- Victoria: Most bathroom renovations do not require a planning permit from council. However, structural, plumbing, or waterproofing work often requires a building permit.
- Always check with your local council before starting. A five-minute call can save you from a very expensive mistake.
Step 3: Decide What You Are Actually Changing
Before you talk to any tradie, get clear on the scope of work. This determines your budget, your timeline, and which licensed trades you need.
Option A: Cosmetic refresh (keep the layout) Replace tiles, update the vanity, swap tapware, install a new showerhead, repaint. Plumbing stays where it is. This is the fastest and cheapest path. You can often be done in one to two weeks with a smaller team.
Option B: Full renovation (keep the layout) Strip everything back to the frame, new waterproofing, new tiles floor to ceiling, new fixtures, new shower, new vanity. Same plumbing positions. This is the most common scope and what most mid-range budgets cover.
Option C: Full renovation with layout changes Moving the shower, relocating the toilet, adding a bath where there was not one, or reconfiguring the floor plan. This involves concrete cutting, new drainage, and significantly more plumbing work. Budget jumps fast — moving the bath to the other wall and converting the old bath area into a walk-in shower can push a quote toward $40,000 to $45,000 once extra demolition, concrete cutting, new drainage, and replanning are included.
Decide on your scope before requesting quotes. If you ask three different builders for quotes on a loosely defined bathroom renovation, you will get three completely different numbers back and no way to compare them.
Step 4: Choose Your Fixtures and Materials Before Renovation Starts
This is a step most people get wrong. They book trades, start demolition, and then spend three weeks choosing tiles. Meanwhile the bathroom sits in a state of disarray, trades move on to other jobs, and the timeline blows out.
Get your selections locked in before demolition begins. This includes:
Tiles: Floor tiles, wall tiles, and feature tiles if you want them. Confirm your tile sizes with your tiler before purchasing, as large format tiles may require additional substrate preparation.
Vanity and basin: Measure the space carefully. Vanity width, depth, and drawer configuration need to work around the existing plumbing rough-in positions if you are not moving them.
Shower: Shower head, tapware, rail, and shower screen or frameless panel. Confirm the glass size with your shower screen supplier after tiling is done, not before. Glass is cut to the finished opening.
Toilet: If you are replacing the toilet, check the rough-in measurement (the distance from the wall to the centre of the drainpipe). Standard Australian rough-in is 140mm to 165mm, but this varies.
Tapware and fixtures: All tapware installed in Australian bathrooms must be WaterMark certified. Installing uncertified products can invalidate compliance certificates and cause council enforcement issues. Check for the WaterMark logo when purchasing.
Exhaust fan and lighting: Both must comply with Australian electrical standards. Any work on bathroom electrical needs a licensed electrician.
Step 5: Understand Which Trades You Need and in What Order
A bathroom renovation in Australia is a multi-trade job. Here is the sequence and who does what.
1. Demolition Strip the existing bathroom, tiles, vanity, fixtures, sometimes wall sheeting. Some owners do this themselves to save money, which is fine for non-structural demolition. If you suspect asbestos (common in homes built before 1990), stop and get an asbestos test done before touching anything.
2. Plumber (first fix) Rough-in plumbing for the new layout, moving pipes, extending waste lines, and positioning tapware outlets. This happens before waterproofing and tiling.
3. Electrician (first fix) Rough-in electrical exhaust fan wiring, lighting positions, heated towel rail wiring if applicable.
4. Waterproofer One of the most critical steps in the whole project. The waterproofer applies membrane to all wet areas the shower floor, shower walls, and bathroom floor if applicable. Waterproofing must be completed in accordance with Australian Standards, primarily AS 3740–2010: Waterproofing of wet areas within residential buildings. The waterproofer provides a compliance certificate when complete.
5. Tiler Tiles go on after waterproofing is inspected and signed off. Do not let anyone rush this step. Tiling over uncertified waterproofing is one of the most common causes of expensive bathroom failures years later.
6. Plumber (second fix) Install the finished fixtures vanity, toilet, tapware, showerhead.
7. Electrician (second fix) Install light fittings, exhaust fan, heated towel rail, and any outlets.
8. Cabinetmaker / Vanity installer Fit the vanity, mirror, and any custom joinery.
9. Glazier Install the shower screen or frameless panel once tiling is fully complete and grout is cured.
10. Painter / Finisher Paint any non-tiled areas, install accessories, touch up, and final clean.
Step 6: Get Quotes the Right Way
Never get one quote. Get at least three and make sure they are quoting on exactly the same scope of work. Give each tradie or builder the same written scope document so you can compare line items rather than just totals.
When reviewing quotes, check that they include:
- Waterproofing and compliance certificate
- Plumbing and electrical compliance certificates
- Waste disposal (demolition rubbish removal)
- Tile adhesive, grout, and installation not just supply of tiles
- All labour, not just materials
Check that the bathroom renovation Sydney cost includes waterproofing certificates, plumbing compliance, and electrical safety testing. If a quote does not mention these, ask specifically. Quotes that exclude compliance items look cheaper upfront and cost more to sort out at the end.
If a quote is significantly below the others, find out why before accepting it. If your builder’s price is far below the typical range for your scope, treat it as a red flag. Shortcuts on waterproofing, plumbing, or compliance can cost far more to fix than you save upfront.
Step 7: Know Your Timeline
A Standard bathroom renovation in Australia typically takes two to four weeks from demolition to completion, assuming trades are coordinated well and materials are on-site when needed.
Here is a rough timeline for a full mid-range renovation:
| Stage | Typical Duration |
| Demolition | 1–2 days |
| Plumber first fix | 1–2 days |
| Electrician first fix | 1 day |
| Waterproofing + cure time | 3–5 days |
| Tiling | 3–5 days |
| Plumber and electrician second fix | 1–2 days |
| Vanity, shower screen, accessories | 1–2 days |
| Touch-ups and final clean | 1 day |
The most common delays are:
- Materials not on-site when trades arrive
- Waterproofing inspection holdups
- Trades not coordinated and leaving gaps between stages
- Hidden issues discovered after demolition, water damage, rotted framing, old asbestos sheeting
If you are project managing the renovation yourself, your main job is keeping trades scheduled back-to-back without gaps and making sure every product is on-site before the trade that needs it shows up.
What Goes Wrong in Bathroom Renovation and How to Avoid It
Choosing tiles before confirming sizing with your tiler. Large format tiles (600x600mm and above) need a flat, properly prepared substrate. If the substrate is not right, the tiler will either need to fix it (extra cost) or refuse to guarantee the job.
Not confirming WaterMark certification on tapware. Unlicensed plumbers sometimes install non-certified tapware to cut costs. If your plumber’s compliance certificate gets queried, non-certified fittings become your problem.
Skipping the waterproofing inspection. Some builders push to tile immediately after waterproofing to keep the schedule moving. The waterproofing membrane needs cure time and should be inspected before tiling starts. Tiles over failed waterproofing means pulling the whole bathroom apart again in a few years.
Not having a written contract. Any bathroom renovation over $5,000 should have a written contract that covers scope, payment schedule, timeline, and what happens if variations arise. A handshake deal is not enough when a dispute comes up after the walls are open.
Frequently Asked Questions
Do I need council approval to renovate my bathroom in Australia? Most like-for-like bathroom renovations that keep existing plumbing positions do not require a Development Application. But structural changes, plumbing relocations, or work in strata properties often do. Always check with your local council before starting, rules vary by state and even by council area.
Do I need a licensed plumber and electrician for a bathroom renovation? Yes. All plumbing and electrical work in Australian bathrooms must be carried out by licensed professionals. DIY plumbing and electrical work in wet areas is illegal in most Australian states regardless of the scope.
How long does a bathroom renovation take in Australia? A standard full renovation typically takes two to four weeks from demolition to completion. Layout changes, custom joinery, or delayed materials can push this to six weeks or more.
What is a WaterMark certification and why does it matter? WaterMark is the Australian certification scheme for plumbing products. Any tapware, showerheads, or plumbing fixtures installed in an Australian bathroom must carry WaterMark certification. Non-certified products can invalidate compliance certificates and create problems when selling the property.
Can I do any of the work myself to save money? Non-regulated work like demolition, painting, and installing accessories is generally fine to DIY. Plumbing, electrical, waterproofing, and any structural work must be done by licensed trades. Attempting regulated work yourself is illegal and voids insurance.
How do I avoid budget blowouts on a bathroom renovation? Lock in your material selections before demolition starts, get three itemised quotes on the same scope, build in a 15 to 20 percent contingency, and get a written contract with a clear scope of work before anyone picks up a tool.
READ ALSO: How to Maximize Kitchen and Bathroom Space with Smart Storage Solutions